Introduction
You have decided on touch panel switches. You have chosen Primezen. Now comes the practical question that every homeowner, interior designer, and electrician faces: how many modules do you need for each room?
Get it wrong and you either end up with multiple panels on one wall (cluttered), or a single panel without enough switching points for all your loads (inconvenient). Get it right and every room has a clean, perfectly functional touch panel that controls everything it needs to — elegantly.
This is Primezen’s complete room-by-room module selection guide for Indian homes.
Understanding Modules: What Each Module Controls
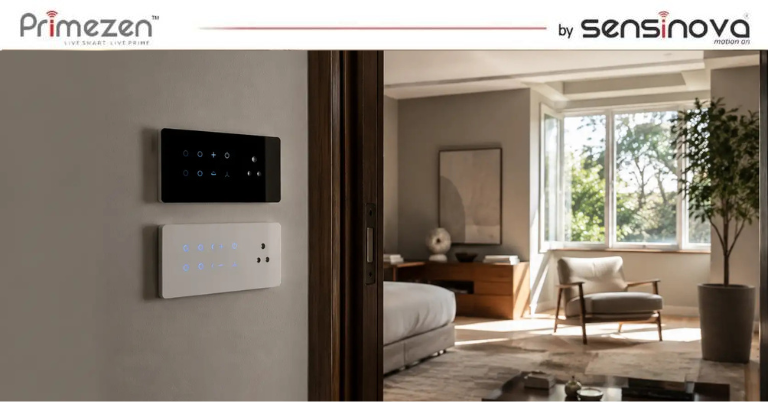
A “module” in a touch panel switch is one switching point — one on/off (or dimmer) control for one electrical circuit.
Examples:
- 1 module = controls 1 light circuit OR 1 fan OR 1 socket
- A 4-module panel = 4 individual switching points on one glass panel
- An 8-module panel = 8 switching points — controls a full room’s electrical circuits from one panel
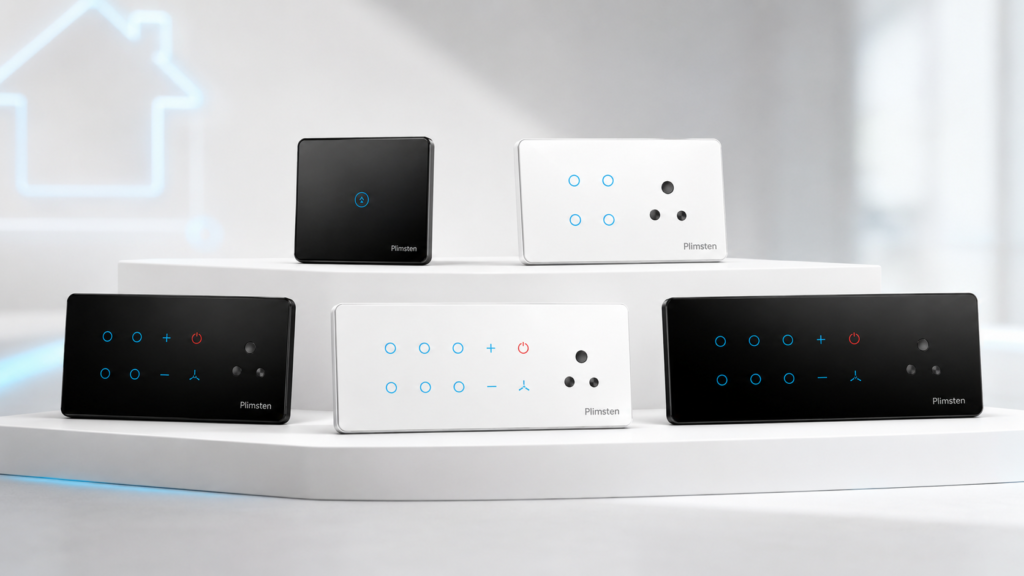
Common module types available in Primezen’s Zen Touch Panel range:
- Standard on/off switch module
- Fan regulator module (speed control)
- Dimmer module (for dimmable lights)
- 2-way/3-way switch module (for staircase/corridor)
- Bell/call module
- USB charging module
- 5A socket module
Room-by-Room Module Selection Guide
Living Room / Drawing Room
Typical electrical loads:
- Main ceiling light or chandelier
- Cove/ambient lighting (1–2 circuits)
- Ceiling fan (1–2 fans)
- AC point (if separate switch)
- Wall light or reading light
- Power socket for entertainment system
Recommended module count: 6–8 modules
A living room is where you want the most control and the most impressive aesthetics. An 8-module Primezen Zen panel covering all lights, fans, and mood lighting gives the room a single, elegant control point.
Suggested configuration (8-module):
- Main light | Cove lights 1 | Cove lights 2 | Reading light | Fan 1 | Fan 2 | AC | Entertainment socket
Master Bedroom
Typical loads:
- Main ceiling light
- Bedside ambient/reading light (1 or 2 circuits)
- Ceiling fan
- AC (if switched at panel)
- Dressing area light
- USB charging or socket
Recommended module count: 4–6 modules
The master bedroom benefits from a 4 or 6-module panel at the door, with a 2-module panel at each bedside for light and fan control without getting up.
Suggested configuration (6-module door panel):
- Main light | Reading light | Fan | Dressing light | AC | Socket
Bedside panel (2-module per side):
- Bedside light | Fan
Children’s Bedroom
Typical loads:
- Main ceiling light
- Study table light
- Fan
- Power socket
Recommended module count: 4 modules
Children’s rooms are simpler — a 4-module panel handles the typical requirements cleanly.
Suggested configuration:
- Main light | Study light | Fan | Socket/USB
Guest Bedroom
Typical loads:
- Main ceiling light
- Bedside light
- Fan
- AC
Kitchen
Typical loads:
- Main kitchen light
- Under-cabinet task light
- Exhaust fan
- Geyser/water heater
- Chimney (if separate switch)
Recommended module count: 4–6 modules
Important note for kitchens: Avoid touch panels directly above cooking areas where steam, grease, and heat are concentrated. Place the panel on a side wall away from the hob. Flat glass surface makes kitchen panels easy to wipe clean — one of touch panels’ best practical features.
Bathroom / Washroom
Typical loads:
- Main light
- Exhaust fan
- Geyser / water heater
Recommended module count: 2–4 modules
A 2-module panel typically suffices for a standard bathroom (light + exhaust fan), with a 4-module panel for bathrooms with a geyser or additional circuits.
Important: Ensure touch panels in or near wet areas comply with appropriate IP ratings for humidity resistance.
Pooja Room / Prayer Room
Typical loads:
- Main light
- Decorative lights (1–2 circuits)
- Bell
Recommended module count: 2–4 modules
Dining Room
Typical loads:
- Main dining light
- Pendant / mood light (dimmer preferred)
- Fan
Recommended module count: 4 modules (include a dimmer for ambient dining atmosphere)
Home Office / Study Room
Typical loads:
- Main ceiling light
- Task/desk lamp circuit
- Fan
- Computer/printer socket
Recommended module count: 4 modules
Garage / Utility Room
Typical loads:
- Main light
- Power socket
Recommended module count: 2 modules
(Modular switches are also acceptable in utility/garage areas — touch panels may not add aesthetic value here)
Corridor / Staircase
Typical loads:
- Staircase lights (2-way switching — on from both levels)
- Night light (if separate)
Recommended module count: 2-module panel at each level with 2-way switch configuration
Summary Guide: Module Count by Room
Room | Minimum Modules | Recommended | Maximum (Full Feature) |
Living Room | 4 | 6 | 8 |
Master Bedroom (door panel) | 4 | 6 | 8 |
Bedside panels (per side) | 1 | 2 | 2 |
Children’s Bedroom | 2 | 4 | 4 |
Guest Bedroom | 2 | 4 | 4 |
Kitchen | 3 | 4 | 6 |
Bathroom | 2 | 2 | 4 |
Dining Room | 2 | 4 | 4 |
Home Office | 2 | 4 | 4 |
Pooja Room | 2 | 2 | 4 |
Corridor/Staircase | 2 per level | 2 per level | 2 per level |
Planning Tips for Touch Panel Module Selection
Tip 1: Think in Rooms, Not Switches
Don’t think about individual switches — think about all the electrical circuits in the room and how you want to group them on a single panel or across multiple panels.
Tip 2: Plan for Future Circuits
Leave one or two extra modules on your panel for future additions — an extra light, a USB charging point, or smart home control. Adding a circuit later is much easier when the panel already has an empty slot.
Tip 3: Use Primezen’s Smart Integration
If you plan to add smart home control, each module in a Primezen Zen Touch Panel can be paired with an RF receiver — allowing phone app control, scene setting, and automation without replacing the panel.
Tip 4: High-Load Circuits
For high-load circuits (geysers above 2 kW, ACs, ovens), ensure your touch panel module and wiring are rated for the load. Primezen’s technical team can advise on appropriate module selection for high-load circuits.
Tip 5: Consult During Construction
The best time to plan your touch panel module layout is during the electrical rough-in phase of construction — when conduit and wiring positions are being finalised. Changing module counts post-construction is expensive.
Frequently Asked Questions
Q1. Can I mix different module types in the same Primezen panel
Yes — a single Primezen Zen Touch Panel can have a combination of on/off modules, fan regulators, dimmer modules, and socket modules — all within the same panel frame.
Q2. What if I have more circuits than my panel can handle?
Add a second panel at the same location (side by side) or at a secondary wall position. Two 4-module panels are often neater than one crowded 8-module panel for large rooms with many circuits.
Q3. Can I upgrade my modular switch board to a Primezen touch panel without rewiring?
In most cases, yes — provided a neutral wire is available at the switchboard location. Your electrician will assess the existing wiring during installation. Most modern Indian construction has neutral wires available at switch points.
Q4. Does Primezen supply custom module configurations?
Primezen’s Zen Touch Panel range offers standard configurations (2, 4, 6, 8 modules). For specific custom requirements, contact Primezen at primezen.in for technical consultation.
Q5. Are all Primezen touch panel modules dimmable?
Standard modules are on/off. Dimmer modules are available separately and must be specified when ordering your panel configuration. Dimmers also require compatible dimmable LED or halogen fittings.
Conclusion
Choosing the right module count for each room is the difference between a smart home installation that feels perfectly designed and one that feels improvised. Use this guide as your room-by-room planning tool — and consult Primezen’s technical team for any custom requirements or smart home integration planning.
🌐 primezen.in | Contact Primezen for Vadodara dealer and installer details